This is an old revision of the document!
Table of Contents
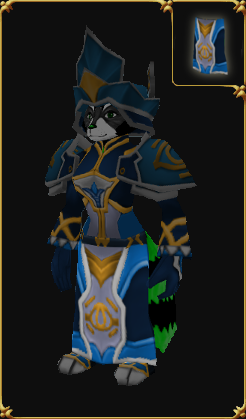
Creating Preview Images For Credit Shop Items
Each credit shop item that has an appearance (basically armour and pets) needs a preview image. I would suggest the following workflow :-
- Take a screenshot of a character wearing the entire set. Also take individual screenshots of each piece.
- Use an image editing tool to cut out the entire character from it's background and the individual pieces.
- Create a preview image by merging each of your cut out pieces and the CS preview background image.
1. Taking Screenshots
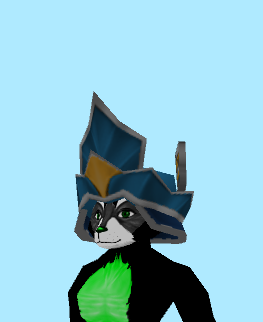
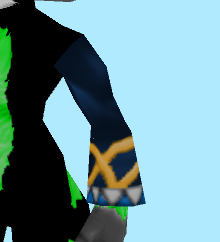
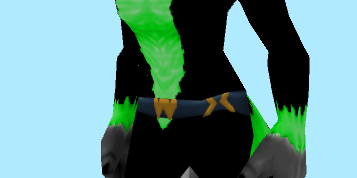
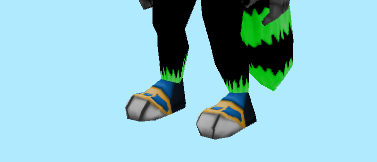
Each piece of the armour (or pet) to add to the credit shop should have its own screenshot, and if the piece of part of a complete set, also take a shot of a character wearing the entire set.
I would recommended using a screenshot utility for this, it will make things easier.
- Shutter - Linux.
- PLEASE ADD - Windows
- PLEASE ADD - Mac OS X
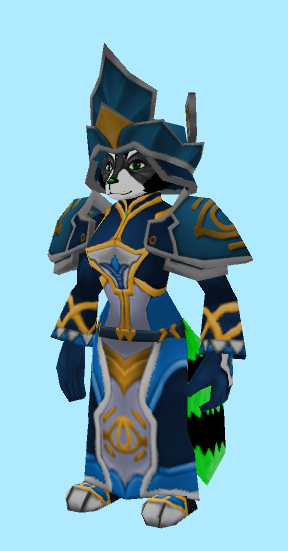
I would also suggest taking the screenshots in a 'blank' zone, i.e. one the does not have any clouds or terrain. This makes cutting out the image easier later on. A zone has been created for this purpose.
/warpi blank
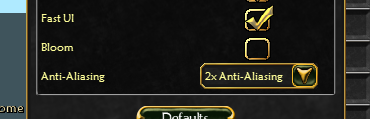
Also turn off Bloom in the option to reduce the brightness of the background and prevent bleeding through of the bright background onto your characters clothes (giving them a fuzzy edge)
When you are done, you should end up with the following screenshots.


2. Cutting Up The Images
Now using your favourite image editing tool, you will cutting the entire set and each individual piece from it's background.
I use the GIMP to do this, it's free and has all the required tools.
* GIMP - For Linux, Mac OS X and Windows
This tutorial will not go into the basics such as loading,importing, saving and cutting and pasting in the GIMP. You should first familiarise yourself with these features and have an understanding of layers and scaling them
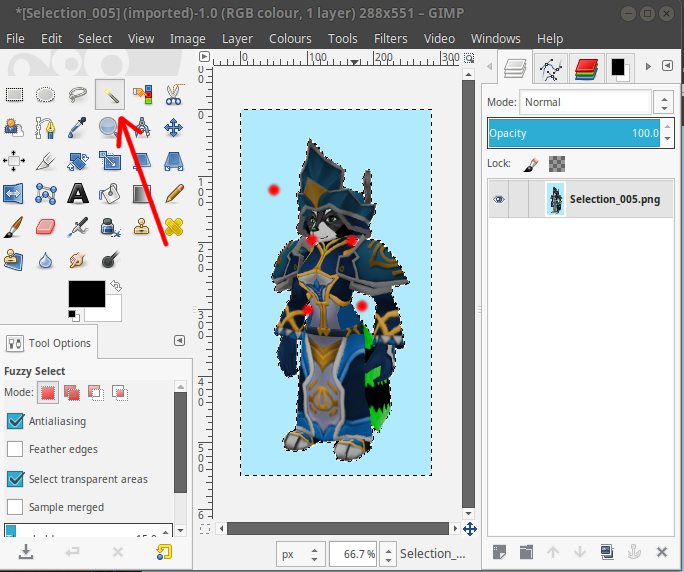
Select the background
Use the tool to select all the background areas. In the GIMP, this is the Fuzzy Select (the 'wand' icon). Click this tool, then any of the light blue background, and the tool will select all adjacent pixels of the same colour. Depending on the background, you may need to adjust the 'Threshold' of the selection. For the gaps in between arms and other areas, you may have to Add to selection by pressing Shift and adding more areas to cut out.
You should now Grow the selection by 1 pixel, then use the Feather Selection option. This smooths out the hard edges you would otherwise get.
Adding the Alpha layer
Because we want to overlay this image onto another, the background needs to be transparent. In GIMP, this is done by Layer → Transparency → Add Alpha Channel
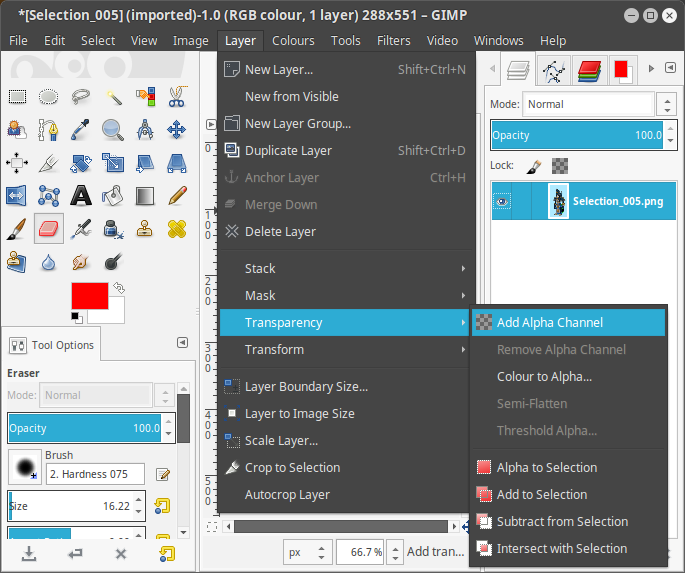
Cutting the selection
Now we have an alpha channel, we can cut our selection, which should remove the light blue background and leave us with just the character on a transparent background (in GIMP, a chequer board indicates transparency).

Now save your new image somewhere safe, and repeat this procedure for each of the pieces.
Cutting out individual parts for the highlight images
You should not need to do this for main complete preview image, but for the individual pieces that are used for the 'highlights', you have some more cutting work to do …
Take one of the transparent piece images (in the example the arms are used), and use the Free Select tool to select the shape of the arm.
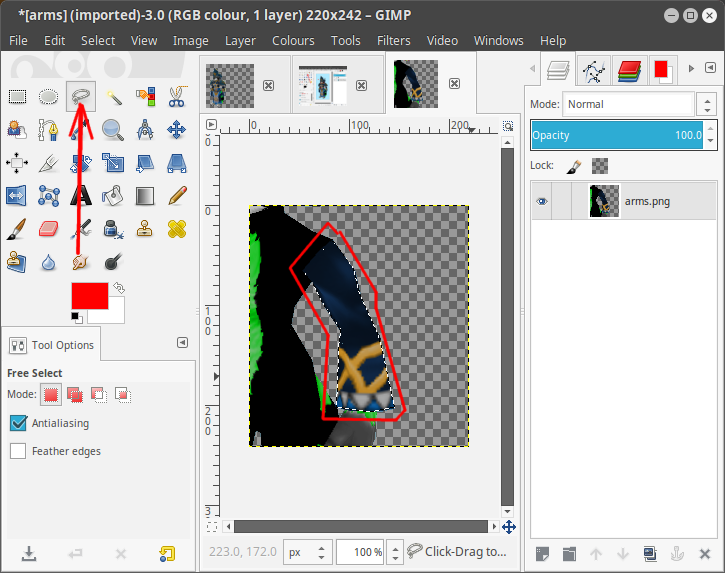
Now use the Invert Selection tool, this reverse the area selected so the everything OUTSIDE of the selection is actually selected instead of everything INSIDE.
Then use Cut again, and you will be left with just the arm.
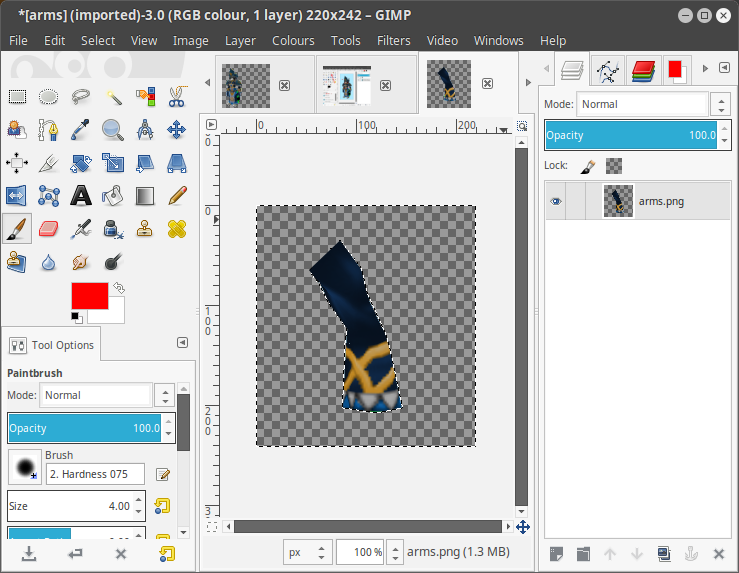
Save this image, and again repeat this for each individual piece. You are now ready to create the the preview images themselves.
1. Creating The Preview Images
You will now need the preview backgrounds. There are two different backgrounds, one for individual items that are not associated with any 'Set', and one for pieces that are part of set.

You can right click these images above to save them and use them as the templates
Creating Set Piece Preview Images
Creating image previews for set pieces is slightly different, because in the complete image, the set piece must be highlighted by being slightly brighter than the surrounding image.
First off, open up the background template image, and then paste the complete set image on top of it. You may need to resize set image slightly so that it fits in the background image correctly (see existing CS preview images for how this should look).

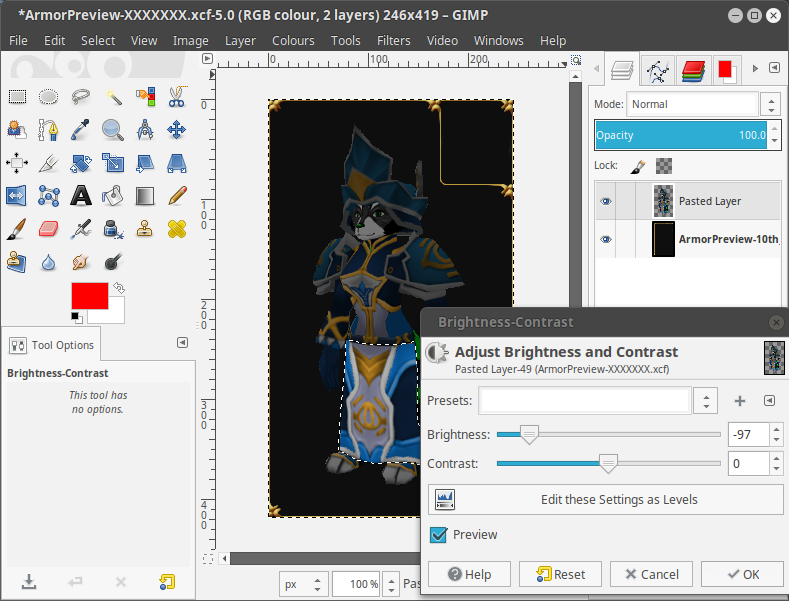
Now use the Free Select tool again to mark out the area that you wish to highlight. This should be as accurate as possible, although it wont be too noticeable if you are a little off. Once the area is selected, use Invert Selection again, as we won't actually be highlight the piece we want, we will be 'lowlighting' the pieces that we DONT want highlighted.
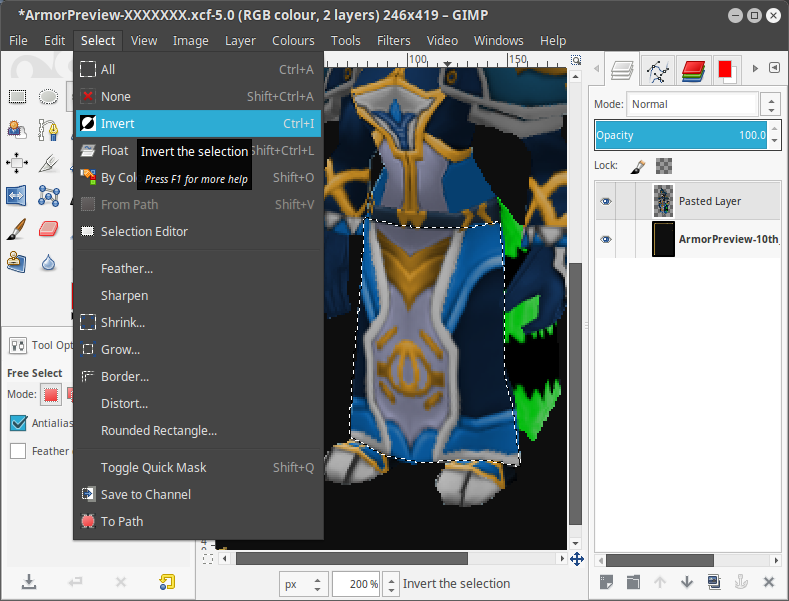
Now open up the Brightness/Contrast dialog and adjust the Brightness*. The areas we want lowlighted should get darker.
<html><br style=“clear:both” /></html>
 <html><br style=“clear:both” /></html>
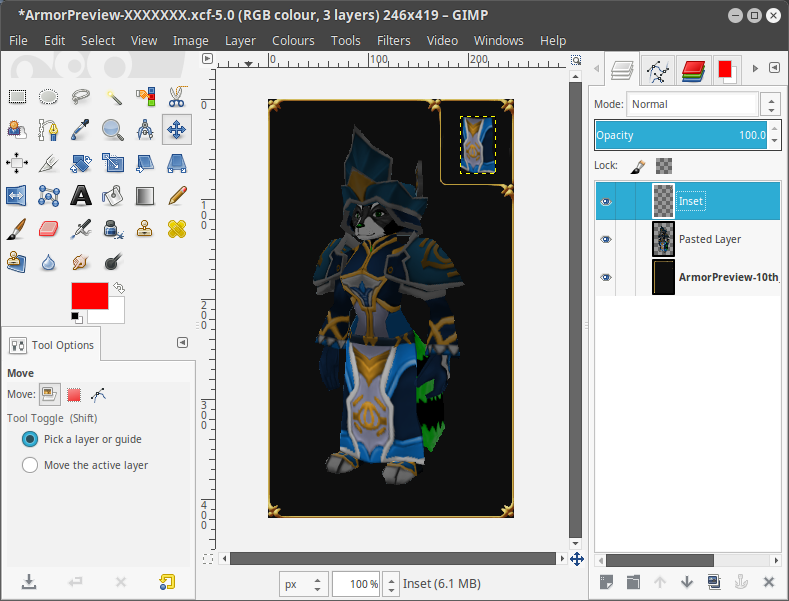
Now you can paste in your previously cut and prepared image for the individual piece. In the example above, the Chest was used. Paste this as a new layer into the smaller box at the top right of background image, scaling it to fit.
<html><br style=“clear:both” /></html>
<html><br style=“clear:both” /></html>
Now you can paste in your previously cut and prepared image for the individual piece. In the example above, the Chest was used. Paste this as a new layer into the smaller box at the top right of background image, scaling it to fit.
<html><br style=“clear:both” /></html>
 <html><br style=“clear:both” /></html>
The final stage is too add a drop Glow to inset image. I use a very light yellow for this, with a width 15 and X and Y offsets of 0.
<html><br style=“clear:both” /></html>
<html><br style=“clear:both” /></html>
Thats it. Save the image. For this example, the filename would be ArmorPreview-Glacial_Chest.png**. Always use this pattern, prefixing with ArmorPreview- and replacing spaces with _ underscores.
<html><br style=“clear:both” /></html>
The final stage is too add a drop Glow to inset image. I use a very light yellow for this, with a width 15 and X and Y offsets of 0.
<html><br style=“clear:both” /></html>
<html><br style=“clear:both” /></html>
Thats it. Save the image. For this example, the filename would be ArmorPreview-Glacial_Chest.png**. Always use this pattern, prefixing with ArmorPreview- and replacing spaces with _ underscores.